Checkout
Allow users to make purchases during onboarding
General
Checkout element is a menu with payment options that processes customers' purchases.
Each Checkout element should be used for a single product (subscription plan, for example) with the same price.
If you have multiple products you should create a separate Checkout element for each product and set up proper Navigation to lead users to appropriate Checkout elements.
Payment providers
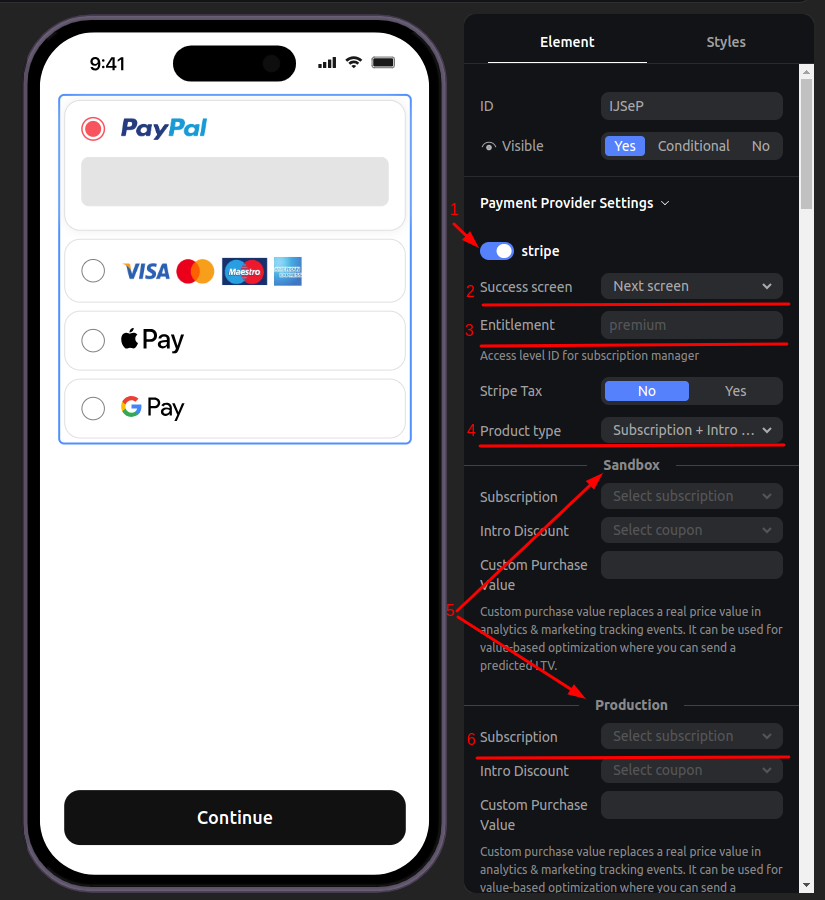
It's necessary to have at least one payment provider configured in your project's settings.
Note: If only one payment provider is connected in your project settings, the "Payment provider settings" menu might not appear. In this case, the system automatically uses the available provider, and no additional configuration is required.
Please refer to the "Payments" section of this documentation for information about payment providers configuration.
There are several common parameters for payment providers:
- Enable/Disable. This switch is used to allow payments through a provider in current element.
- Success screen. This menu determines which onboarding screen will be shown after successful payment.
- Entitlement. This parameter will be used by your subscription management service to grant user corresponding access level in your app.
- Product type. Use this menu to set product type, such as one-off deal or subscription.
- Sandbox and Production. These blocks determine which products will be used for Preview and Published onboardings.
- Subscription/Plan/Product. In this menu you can set the exact product from your catalog for users to pay for. Products should be set up in payment providers' product catalogs first in order to appear in this menu.
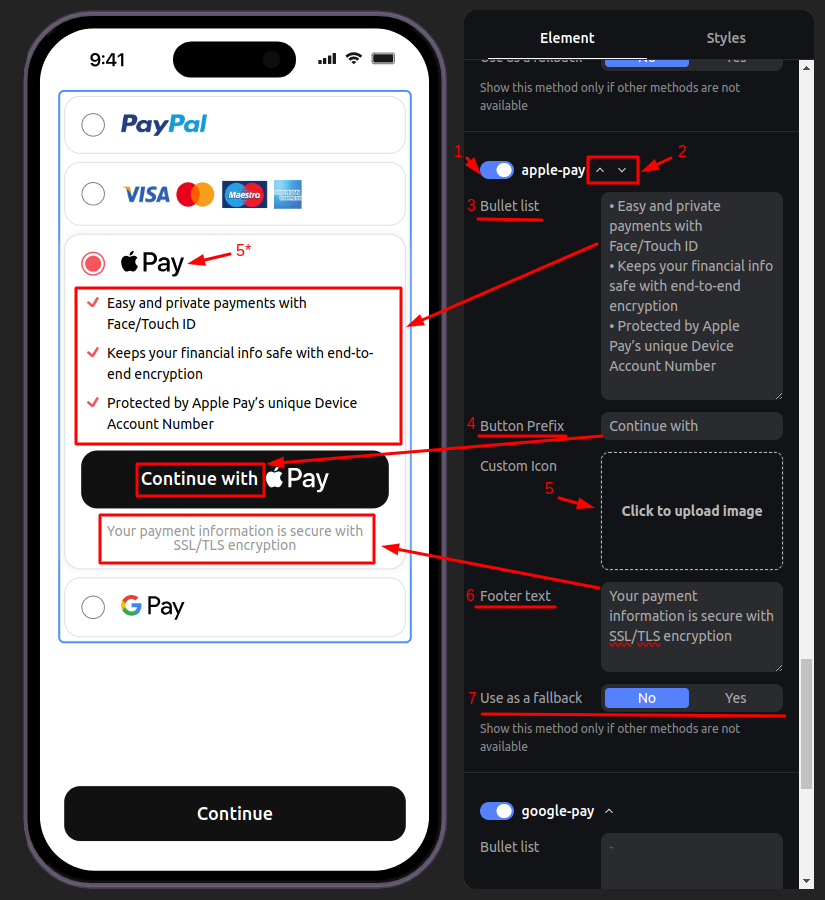
Payment Methods
This section allows you to customize displayed payment options.
Each payment method uses similar set of parameters:
- Enable/Disable. This switch enables payment method display.
- Alignment arrows. Use these arrows to change order in which payment methods are displayed.
- Bullet list. Here you can tell your customers advantages of using current payment method.
- Button Prefix. You can add custom text into the payment button.
- Custom Icon. Uploaded image will be only displayed instead of default payment method icon in the list (5*).
- Footer text. Add some text below payment button to increase users' confidence to pay.
- Use as a fallback. When this switch is set to "Yes" current payment method won't be shown unless other methods have failed to load. Use it if you don't want users to pay with this method, but this method is ok if no other method is available.
Updated 3 months ago